-17%
, , ,

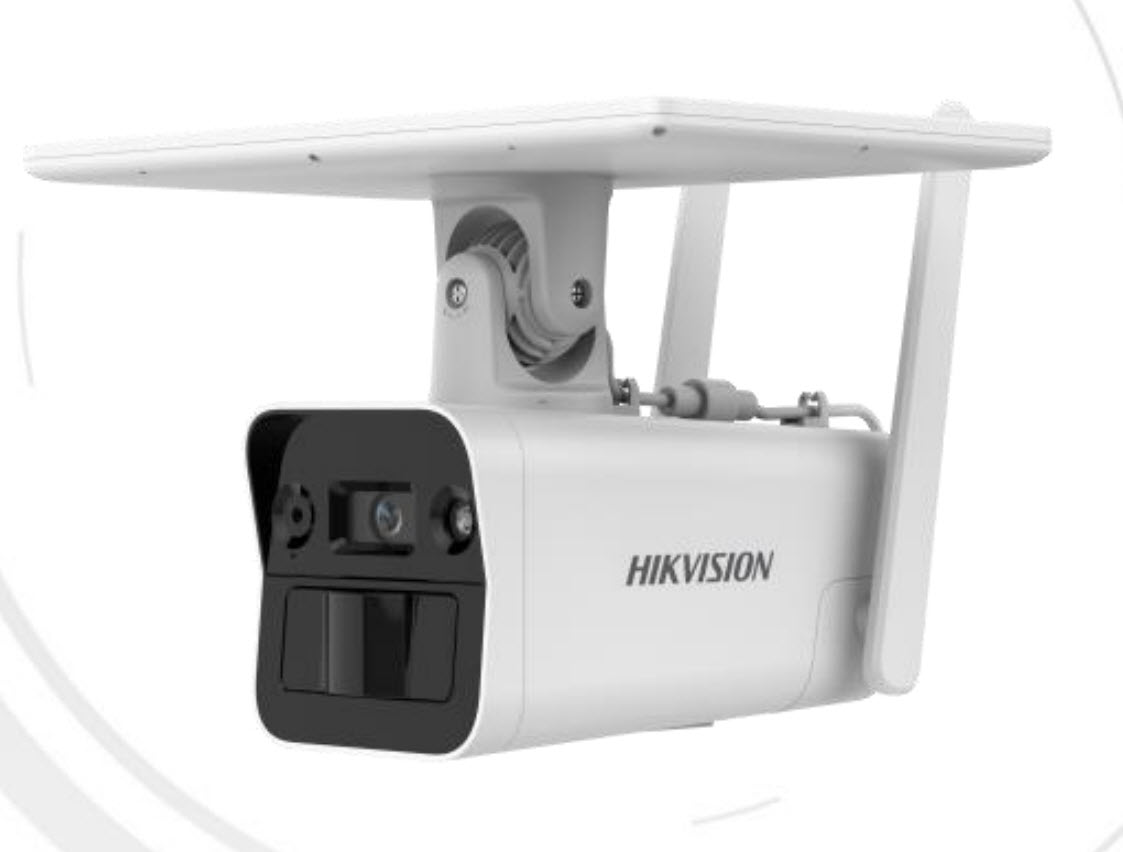
Hikvision DS-2XS2T41G1-ID/4G 4MP Solar-powered Security Camera Setup with 4G


  • High quality imaging with 4 MP resolution
  • Standalone with solar panel and built-in battery
  • Support human and vehicle detection
  • Provide real-time security via built-in two-way audio
  • Water and dust resistant (IP67)
  • Support 4G (LTE-TDD/LTE-FDD/TD-SCDMA) communication
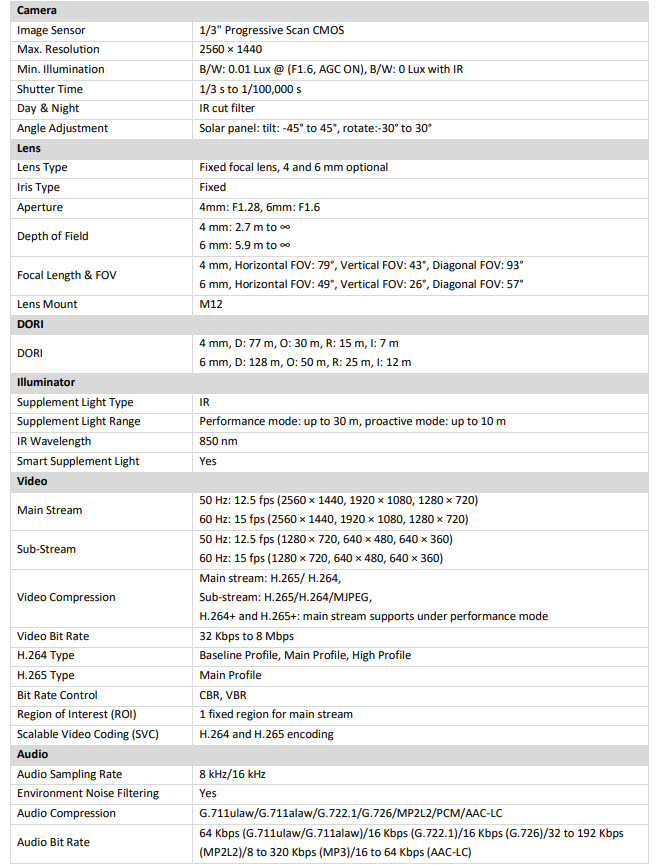
  • 4mm available 4 mm: 2.7 m to ∞

$530.00 $638.00 inc GST +3 Year Warranty & Support


To activate and set up your Hikvision DS2XS2T41G1ID/4G solar-powered security camera, follow these steps:

  1. Unbox and Inspect:
    • Carefully unbox the camera and ensure all components are present and undamaged.
  2. Install the SIM Card:
    • Locate the SIM card slot on the camera.
    • Insert a compatible micro SIM card with an active data plan.
  3. Mount the Camera:
    • Choose a location with optimal sunlight exposure for the solar panel.
    • Securely mount the camera using the provided hardware.
    • Adjust the solar panel’s tilt (-45° to 45°) and rotation (-30° to 30°) to maximize sunlight capture.
  4. Power On the Camera:
    • The camera is designed to be powered by its built-in solar panel and battery.
    • Ensure the solar panel is exposed to sunlight to charge the battery.
    • If necessary, connect the camera to a 12 VDC power source for initial setup or debugging purposes.
  5. Activate the Camera:
    • Using a Web Browser:
      • Connect your computer to the same network as the camera.
      • Open a web browser and enter the camera’s IP address.
      • Log in with the default credentials.
      • Follow the on-screen instructions to activate the camera.
    • Using the iVMS-4200 Software:
      • Download and install the iVMS-4200 client on your computer.
      • Launch the software and navigate to the “Device Management” section.
      • Click “Add” to detect and add the camera.
      • Follow the prompts to activate the device.
  6. Configure Network Settings:
    • Access the camera’s settings via the web interface or iVMS-4200.
    • Navigate to the network settings and configure the 4G parameters.
    • Ensure the SIM card’s APN (Access Point Name) and other settings match your mobile carrier’s requirements.
  7. Enable Hik-Connect Service:
    • In the camera’s settings, enable the Hik-Connect service to allow remote access.
    • Note the verification code provided during this setup.
  8. Add the Camera to Hik-Connect App:
    • Download and install the Hik-Connect app on your smartphone.
    • Log in or create a Hik-Connect account.
    • Tap the “+” icon to add a new device.
    • Scan the QR code on the camera or manually enter the serial number.
    • Enter the verification code noted earlier.
    • Complete the setup to access the camera’s live feed remotely.
  9. Test the Setup:

Register a Free Account now for access to Better Prices or Log-In Here

Save & Share Cart
Your Shopping Cart will be saved and you'll be given a link. You, or anyone with the link, can use it to retrieve your Cart at any time.
Back Save & Share Cart
Your Shopping Cart will be saved with Product pictures and information, and Cart Totals. Then send it to yourself, or a friend, with a link to retrieve it at any time.
Your cart email sent successfully :)